How to render custom fixed replies to your React UI Kit CometChat Component
Guide Details:
Language/Framework: React
SDK and UI Kit Versions:
"@cometchat/calls-sdk-javascript": "^4.0.6",

"@cometchat/chat-sdk-javascript": "^4.0.3",

"@cometchat/chat-uikit-react": "^4.1.1",
SDK Documentation: Web SDK
UI Kit Documentation: React UI Kit
Note this guide is only for react UI Kit.
Our other UI Kits can follow a similar implementation. Please join our office hours if you would like to learn more about our other UI Kit implementations.
Introduction
Auto-replies streamline communication by providing users with predefined responses they can quickly choose and send, enhancing efficiency and user experience. There are two ways to implement this in CometChat:
-
Static Custom Component/View: Always render a static custom component by setting the custom
headerViewto theMessageComposercomponent using the HeaderView property. Refer to the UI Kit documentation for details. When the user clicks on your bubble auto reply, you will need to use the CometChatUIKit to send the message. -
Dynamic Rendering with UI Events: Use UI Events to conditionally render the custom component.
In this guide, we will explore the second option. If both users have each other’s 1-1 chat open, we can render custom bubble components with auto-reply functionality in the chat. This solution guide provides a high-level overview of how to render the child component above the message composer. Note that you will need to build your own UI component to render the auto-replies.
Modify your component
You will first need to add the following steps to your React component returning the CometChat component to render the space for your UI.
- When the component mounts (at React.useEffect()), it calls CometChatUIKit.getLoggedinUser() to retrieve the currently logged-in user.
- If a user is logged in, it subscribes to the ccActiveChatChanged event, which triggers when the active chat changes. More on CometChatUIEvents in our documentation.
- Inside the subscription callback, it checks if the received message is from a sender other than the logged-in user.
- If the message is from a different sender (not the logged in user), it triggers another event (ccShowPanel) to display smart replies for the received message.
- ccShowPanel() will allow us to add a child component to display
- Finally, it unsubscribes from the ccActiveChatChanged event when the component unmounts.
You can add the below code to your component that renders the CometChat Messages. In our example, we are using ConversationsWithMessages.
React.useEffect(() => {

CometChatUIKit.getLoggedinUser().then((user) => {
if (user) {
const ccActiveChatChanged = CometChatUIEvents.ccActiveChatChanged.subscribe(
(data: IActiveChatChanged) => {

    const message = data.message!;
    if (message) {
        if (message.getSender().getUid() !== user?.getUid()) {
            CometChatUIEvents.ccShowPanel.next({
            message: message,
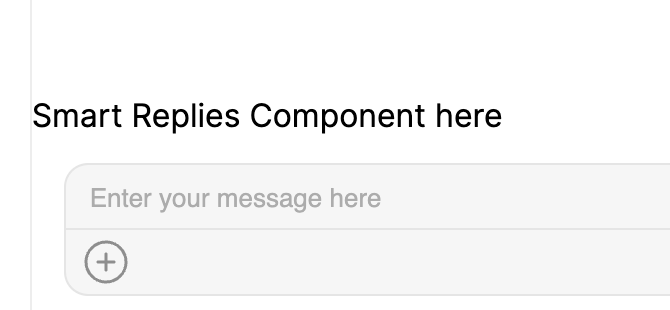
            child: <>Smart Replies Component here</>,
            position: PanelAlignment.messageListFooter,
        });
        }
    }
}
);

return () => {
ccActiveChatChanged?.unsubscribe();
};
}
});
}, []);

// return your component
return (

            <CometChatConversationsWithMessages />

    );
Test the code
- To test this, use 2 different users in and navigate to their conversation.
- Send a message as user 1 to user 2. If you log in as user 2, and navigate to user 1 conversation you will see this panel appear.
- Result of using the template code above:

Create your own component
You will need to create your own child component to list out all the smart replies available. You can create a component with multiple smaller bubble components. Each of your bubble components can hold the auto reply message you would like to send.
Send the message via UI Kit
Additionally, when the user clicks on your bubble auto reply, you will need to use the CometChatUIKit to send the message.