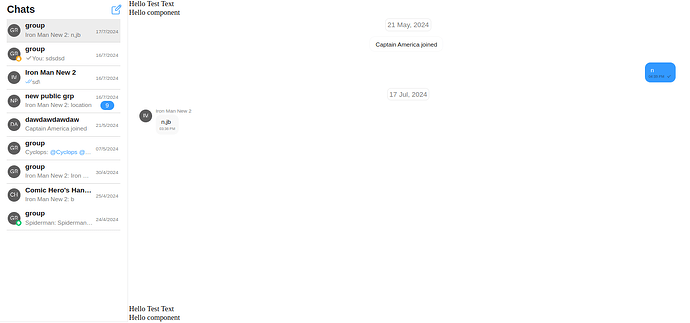
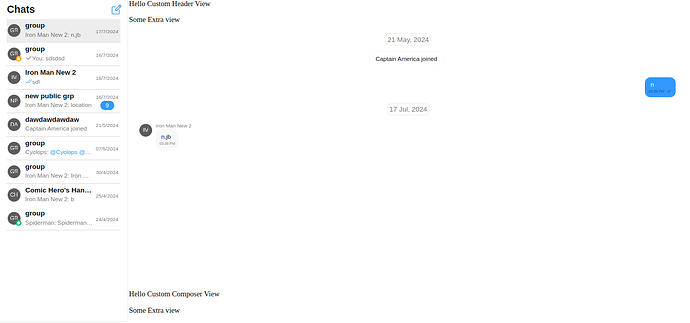
Guide Overview
This guide explains how you can pass a custom view to the messageComposerView or messageHeaderView in the Vue UI Kit.
UI Kit version:
"@cometchat/chat-uikit-vue": "^4.3.14",
Please note this method of passing components can be used anywhere in the UIKit to pass custom view.
If you wish to pass an entire component in the custom view -
You can follow the steps mentioned below which will reflect the changes in the UI.
1. Create a custom component (Temp.vue)-
<template>
    <div @click="$emit('test')">
        Hello
        {{ customText }}
    </div>
    <slot name="test">
    </slot>
</template>

<script lang="ts" setup>
defineEmits(["test"]);
// Define props
const props = defineProps({
    customText: String,
});
</script>
- You can pass the HTML content that should be injected into the named slot (test) of this custom component from the configurations.
- You can emit some custom events to the parent component from this custom component.
- You can listen for that event (test) and trigger any function as per your requirement.
- You can pass props to the custom component as well.
2. The configuration you need to pass in the CometChat Component-
    function getConfig() {
      return new MessagesConfiguration({
        messageComposerView:{
          componentName: "Temp",
          slots: [{
            key: "test",
            html: "<div> Hello component</div>"
          }],
          listeners: {
            "test": () => {
              alert("clicked");
            }
          },
          props: {
            customText: "Test Text"
          }
        } as ViewType,
        messageHeaderView: {
          componentName: "Temp",
          slots: [{
            key: "test",
            html: "<div> Hello component</div>"
          }],
          listeners: {
            "test": () => {
              alert("clicked");
            }
          },
          props: {
            customText: "Test Text"
          }
        } as ViewType,
      })
    }
For this guide we will pass this configuration in CometChatConversationsWithMessages
 <div style="height: 700px;width: 80vw;">
        <CometChatConversationsWithMessages :is-mobile-view="false" :messagesConfiguration="getConfig()" />
 </div>
You can import the Temp component globally by importing it in main.ts
import Temp from "./Temp.vue"

const vueApp = createApp(App);
vueApp.component("Temp",Temp)
vueApp.mount(#app)
If you wish to pass HTML Content directly in the custom view -
You just need to pass the following configuration to the CometChat component-
Create the entire view in the configuration itself. It will reflect the changes in components UI -
  function getConfig() {
      return new MessagesConfiguration({
        messageComposerView:{
          html:`
          <div>Hello Custom Composer View
            <p>Some Extra view</p>
          </div>
          `
        },
        messageHeaderView:{
          html:`
          <div>Hello Custom Header View
            <p>Some Extra view</p>
          </div>
          `
        }
      })
    }
Passing the configuration to the component -
 <div style="height: 700px;width: 80vw;">
        <CometChatConversationsWithMessages :is-mobile-view="false" :messagesConfiguration="getConfig()" />
 </div>

