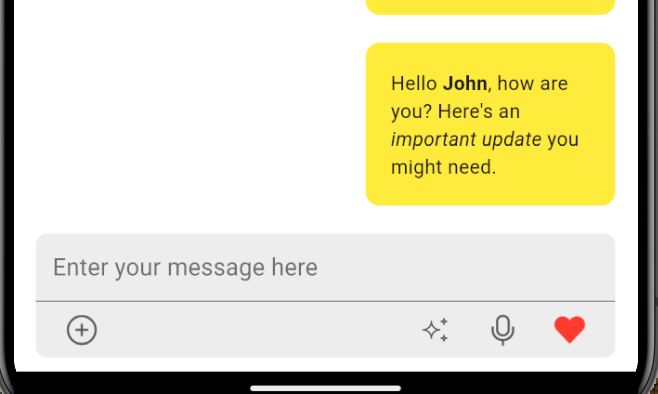
This guide explains how to leverage Custom Messages in CometChat’s Flutter UI Kit to receive and display rich text messages in your Flutter app.
Guide Details
Language/Framework: Dart
UI Kit Version:
cometchat_chat_uikit: ^4.5.10
Related docs:
Message Structure
Message Templates
Introduction
Custom messages allow you to define your own message types to suit your application’s needs, such as receiving and displaying rich text messages. This guide will walk you through creating a custom message template, handling rich text rendering, and integrating it into your Flutter app. We’ll be using API and
flutter_html package in this guide.
Solution
To change the default action messages in a group chat, follow these steps:
- Retrieve All Message Templates
final templates = CometChatUIKit.getDataSource().getAllMessageTemplates();
- Create a Custom Message Template
Define a custom message template by specifying the type and category. In this case, you’ll be working with rich text, so define the type as “your_type” and the category as “custom”.
final customTemplate = CometChatMessageTemplate(
  type: "text",
  category: MessageCategoryConstants.custom,
  bubbleView: (baseMessage, context, alignment, {additionalConfigurations}) {
    // Check if baseMessage is of type CustomMessage
    if (baseMessage is CustomMessage) {
      // Assume that baseMessage.text contains HTML-formatted string
      return Container(
        width: MediaQuery.of(context).size.width / 2.5,
        padding: const EdgeInsets.all(10),
        margin: const EdgeInsets.only(top: 10, bottom: 10),
        decoration: BoxDecoration(
          color: Colors.yellow,
          borderRadius: BorderRadius.circular(10),
        ),
        // Render HTML content inside the message bubble
        child: Html(
          data: baseMessage.customData["key"],
          style: {
            "b": Style(fontWeight: FontWeight.bold),
            "i": Style(fontStyle: FontStyle.italic),
            "u": Style(textDecoration: TextDecoration.underline),
          },
        ),
      );
    } else {
      // Return an empty container for non-text messages
      return Container();
    }
  },
);
- Add the Custom Template to Existing Templates
Once you’ve defined the custom message template, add it to the list of existing templates:
templates.add(customTemplate);
- Apply the Custom Templates to Message Configuration
After you’ve added the custom templates, set them in the MessageConfiguration to ensure they are used for rendering custom messages.
CometChatConversationsWithMessages(
  messageConfiguration: MessageConfiguration(
    messageListConfiguration: MessageListConfiguration(
      templates: templates,
    ),
  ),
);
- Pass the defined type to the MessageRequestBuilder
After you’ve added the custom templates, set them in the MessageConfiguration to ensure they are used for rendering custom messages.
CometChatConversationsWithMessages(
            messageConfiguration: MessageConfiguration(
                messageListConfiguration: MessageListConfiguration(
                  templates: templates,
                  messagesRequestBuilder: cc.MessagesRequestBuilder()
                    ..types = cc.CometChatUIKit.getDataSource().getAllMessageTypes() + ["your_type"]
                )),
          ),
- Send custom message using API
You have now handled custom messages and now you can send custom messages using Send Message API. When sending a message from the CometChat API, ensure you define the same type and category (“custom”) for your message. This will ensure your custom template is applied when rendering the message.
Run Your App
Once you’ve implemented these changes, run your app. You’ll now be able to send and receive custom rich text messages, which will be rendered using your custom template.
