This guide offers how to implement Slash commands inside your CometChat React app using a custom text formatter.
By following these steps, you’ll be able to trigger dialogs or actions whenever a user types a predefined command like /zen.
Create a Custom SlashTextFormatter
We’ll extend CometChatTextFormatter to listen for slash (/) commands and open a dialog when a shortcut is detected.
Create a file SlashTextFormatter.ts and add the following code:
import { CometChatTextFormatter } from "@cometchat/chat-uikit-react";
import DialogHelper from "./Dialog";

export class SlashTextFormatter extends CometChatTextFormatter {
  private shortcuts: { [key: string]: string } = {};
  private dialogIsOpen: boolean = false;
  private dialogHelper = new DialogHelper();
  private currentShortcut: string | null = null;

  constructor() {
    super();
    this.setTrackingCharacter("/");

    // Define your shortcuts here
    this.shortcuts = {
      "zen": "zendesk",
    };
  }

  onKeyUp(event: KeyboardEvent) {
    const caretPosition =
      this.currentCaretPosition instanceof Selection
        ? this.currentCaretPosition.anchorOffset
        : 0;

    const textBeforeCaret = this.getTextBeforeCaret(caretPosition);
    const match = textBeforeCaret.match(/([a-zA-Z]+)$/);

    if (match) {
      const shortcut = match[0];
      const replacement = this.shortcuts[shortcut];

      if (replacement) {
        if (this.dialogIsOpen && this.currentShortcut !== shortcut) {
          this.closeDialog();
        }
        this.openDialog(replacement, shortcut);
      }
    } else if (!textBeforeCaret) {
      this.closeDialog();
    }
  }

  getCaretPosition() {
    if (!this.currentCaretPosition?.rangeCount) return { x: 0, y: 0 };
    const range = this.currentCaretPosition.getRangeAt(0);
    const rect = range.getBoundingClientRect();
    return { x: rect.left, y: rect.top };
  }

  openDialog(buttonText: string, shortcut: string) {
    this.dialogHelper.createDialog(
      () => this.handleButtonClick(buttonText),
      buttonText
    );
    this.dialogIsOpen = true;
    this.currentShortcut = shortcut;
  }

  closeDialog() {
    this.dialogHelper.closeDialog();
    this.dialogIsOpen = false;
    this.currentShortcut = null;
  }

  handleButtonClick = (buttonText: string) => {
    console.log("Button clicked with text:", buttonText);
    if (this.dialogIsOpen) this.closeDialog();
  };

  getFormattedText(text: string): string {
    return text;
  }

  private getTextBeforeCaret(caretPosition: number): string {
    if (
      this.currentRange &&
      this.currentRange.startContainer &&
      typeof this.currentRange.startContainer.textContent === "string"
    ) {
      const textContent = this.currentRange.startContainer.textContent;
      if (textContent.length >= caretPosition) {
        return textContent.substring(0, caretPosition);
      }
    }
    return "";
  }
}
Create the Dialog Component
The dialog will appear when a user types a valid slash command.
Create a file Dialog.tsx and add the following:
import React from "react";
import { CometChatUIEvents, PanelAlignment } from "@cometchat/chat-uikit-react";

interface DialogProps {
  onClick: () => void;
  buttonText: string;
}

const Dialog: React.FC<DialogProps> = ({ onClick, buttonText }) => {
  return (
    <div style={{ width: "800px", height: "45px" }}>
      <buttonstyle={{
          width: "800px",
          height: "100%",
          cursor: "pointer",
          backgroundColor: "#f2e6ff",
          border: "2px solid #9b42f5",
          borderRadius: "12px",
          textAlign: "left",
          paddingLeft: "20px",
          font: "600 15px sans-serif, Inter",
        }}
        onClick={onClick}
      >
        <div style={{ display: "flex", alignItems: "center", gap: "10px" }}>
          <imgsrc="https://img.icons8.com/color/512/zendesk.png"
            alt="Pin"
            style={{ width: "24px", height: "24px", objectFit: "contain" }}
          />
          <span>{buttonText}</span>
        </div>
      </button>
    </div>
  );
};

export default class DialogHelper {
  private dialogContainer: HTMLDivElement | null = null;

  createDialog(onClick: () => void, buttonText: string) {
    this.dialogContainer = document.createElement("div");
    document.body.appendChild(this.dialogContainer);

    CometChatUIEvents.ccShowPanel.next({
      child: <Dialog onClick={onClick} buttonText={buttonText} />,
      position: PanelAlignment.messageListFooter,
    });
  }

  closeDialog() {
    if (this.dialogContainer) {
      CometChatUIEvents.ccHidePanel.next(PanelAlignment.messageListFooter);
      this.dialogContainer.remove();
      this.dialogContainer = null;
    }
  }
}
Attach the Formatter to the Message Composer
Finally, add the SlashTextFormatter to the CometChatMessageComposer.
import { SlashTextFormatter } from "./SlashTextFormatter";

<CometChatMessageComposerhideSendButton={!isAdmin}
  textFormatters={[new SlashTextFormatter()]}
  disableSoundForMessage={true}
  user={user}
  group={group}
/>
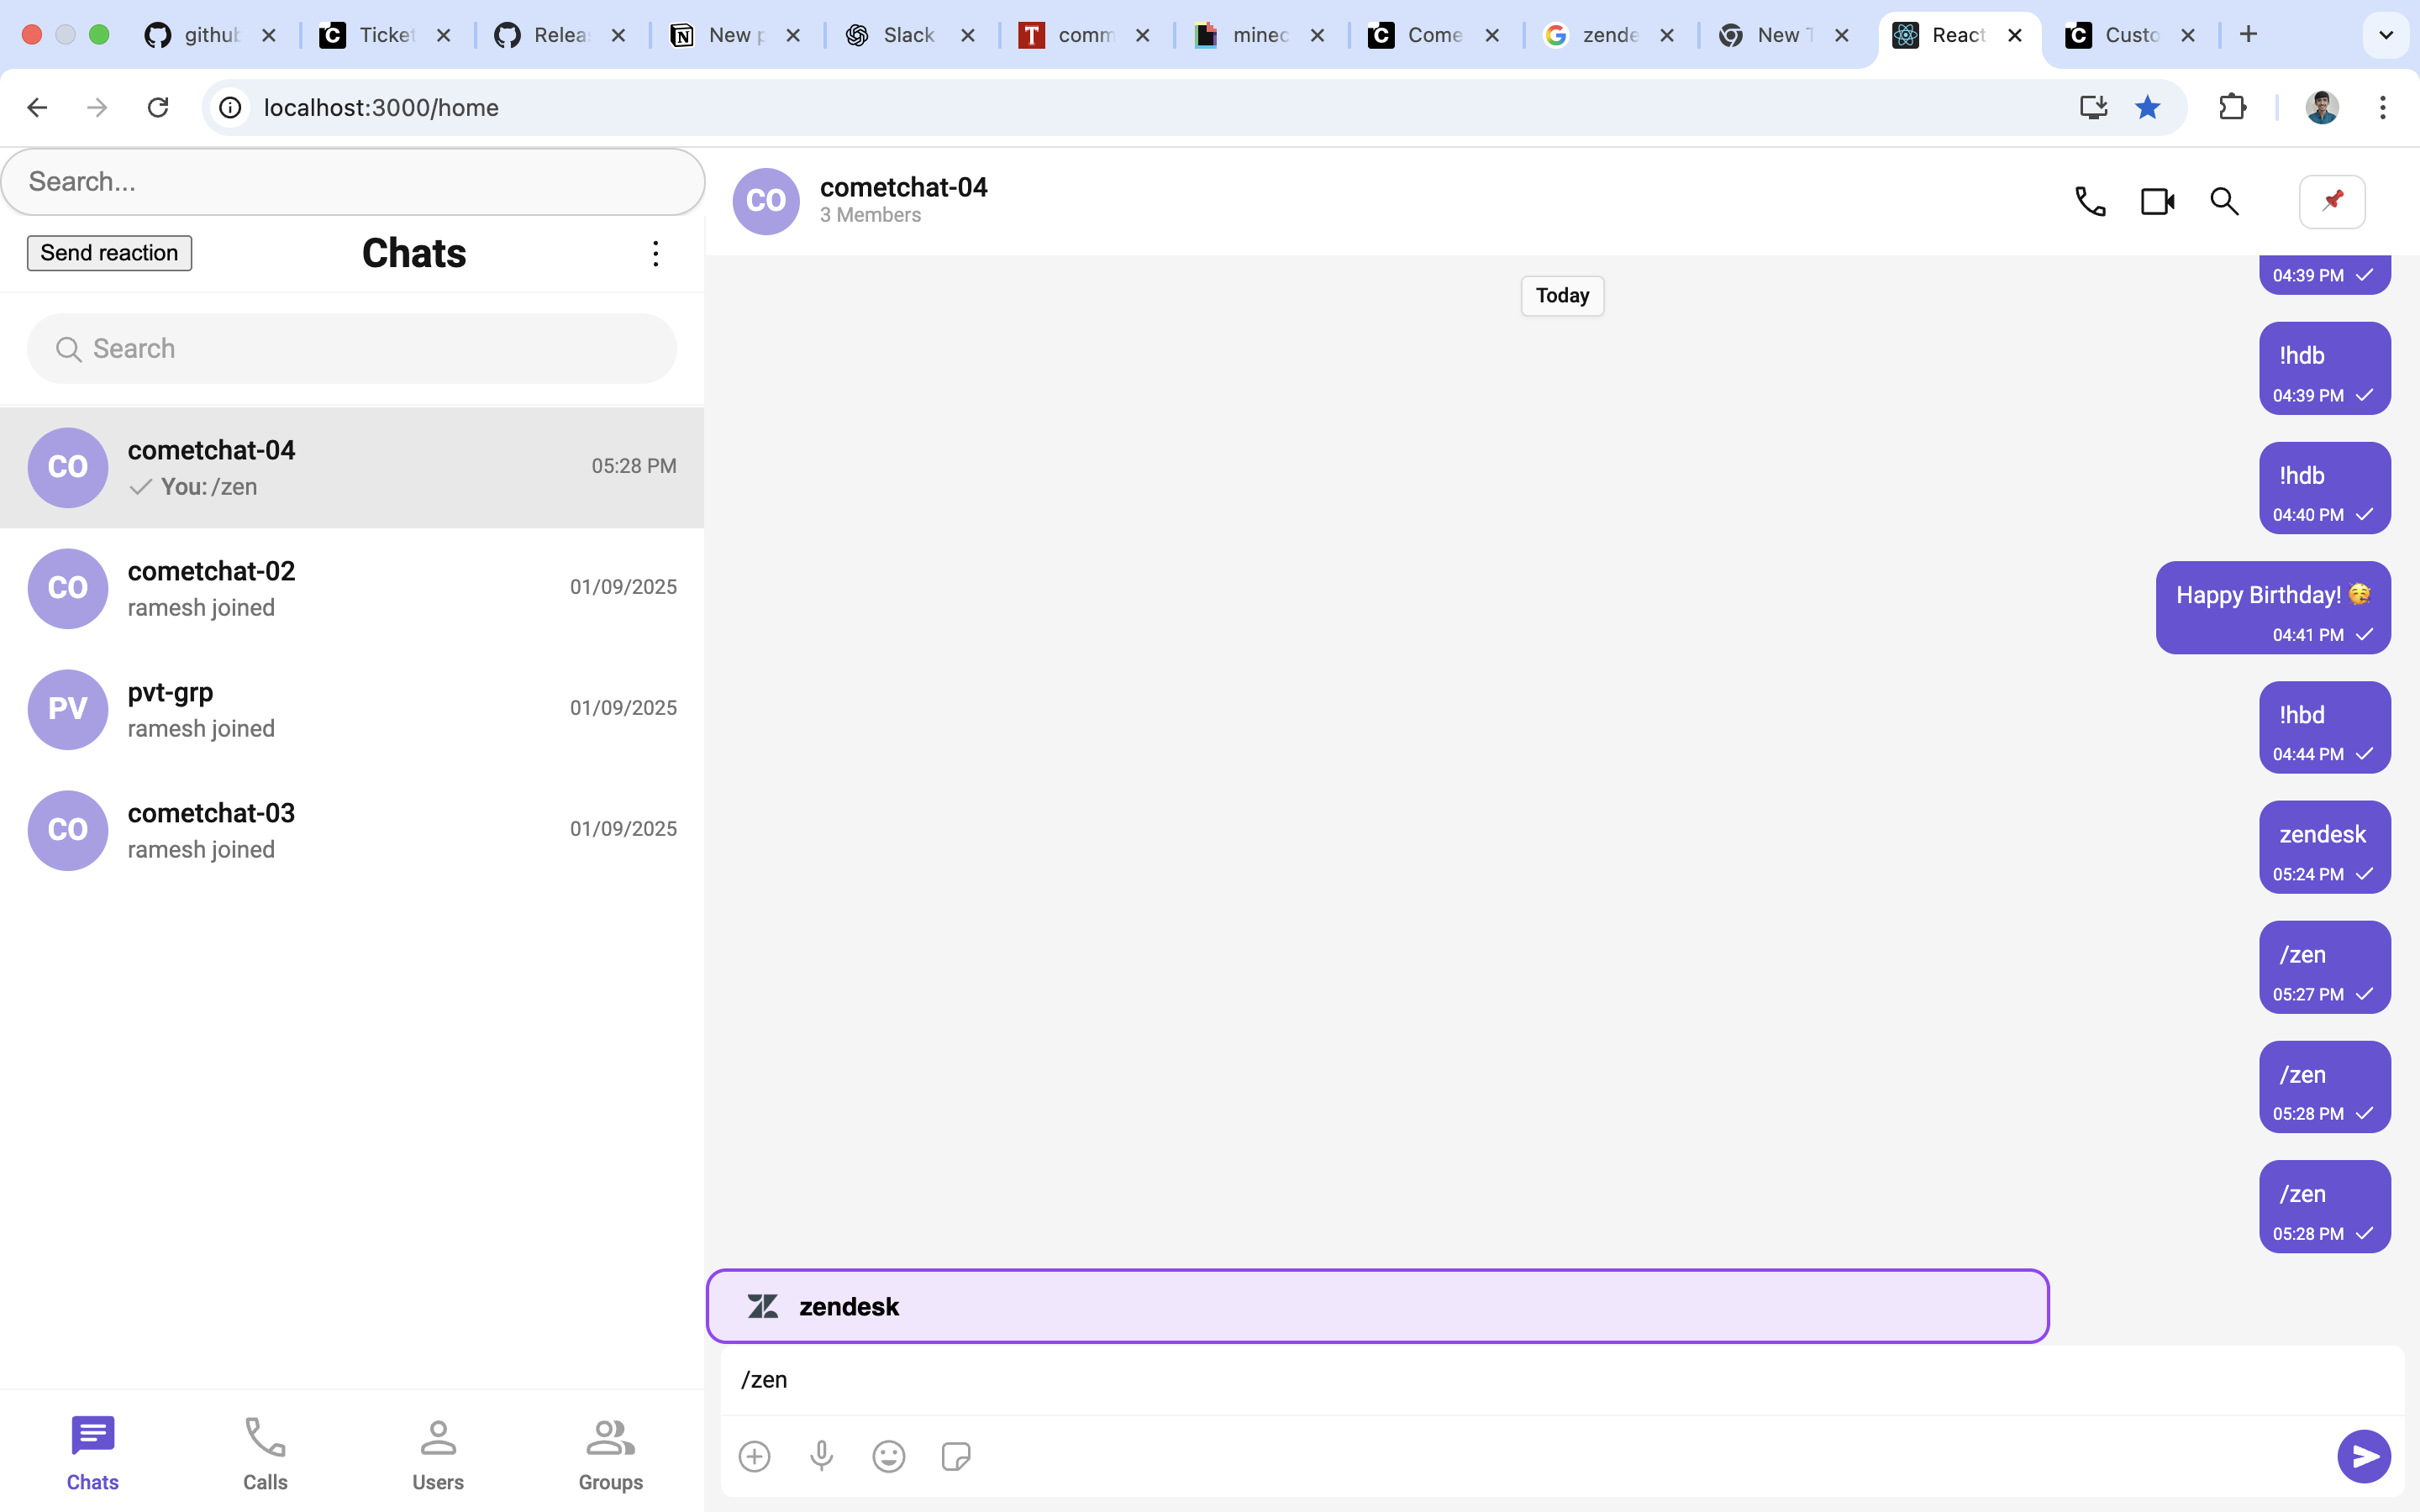
Now when you type /zen in the composer:
- The formatter detects the shortcut.
- A custom dialog box opens at the bottom of the message list.
- Clicking the button executes your
handleButtonClicklogic (currently logs to console, but you can replace it with any action).
Extend with More Shortcuts
To add more commands, just update the shortcuts object in SlashTextFormatter:
  "zen": "zendesk",
  "bug": "Report a bug",
  "help": "Customer support",
};