Guide Overview:
This guide offers a step-by-step walkthrough on how to create a custom build of the Chat Widget using the React UIKit v6. By doing so, you can apply specific tweaks or modifications to the default behavior of UIKit, enabling you to better align the chat experience with your unique business requirements and user expectations .
Custom Implementation Web Widget:
- For Sample App Users: If the CometChat sample app meets your business needs out of the box, you can directly use it for deploying your widget. This guide is structured with steps based on the sample app and requires minimal changes, making it the quickest path to launching your chat widget.
- For Custom Build Users: If your business requires specific customizations or advanced UI behavior, you can implement a custom build using the CometChat React UIKit directly in your own project. This approach allows full flexibility and can be used for both deployment and widget creation, tailored exactly to your requirements.
Clone and Setup the Sample App:
git clone https://github.com/cometchat/cometchat-uikit-react/tree/v6/sample-app
cd cometchat-uikit-react
cd sample-app
npm install
Create the CometChatWidget Component
Create a file named CometChatWidget.tsx at the following route:
SampleApp/src/CometChatWidget/CometChatWidget.tsx
Please make sure that you are adding app credentials in COMETCHAT_CONSTANTS.
import React, { useEffect, useState } from "react";
import { CometChatUIKit, UIKitSettingsBuilder } from '@cometchat/chat-uikit-react';
import { CometChatHome } from "../CometChatHome/CometChatHome";
import { COMETCHAT_CONSTANTS } from "../../AppConstants";

const CometChatWidget = () => {
  const [isReady, setIsReady] = useState(false);
  const [error, setError] = useState<string | null>(null);

  useEffect(() => {
    const params = new URLSearchParams(window.location.search);
    let appId = COMETCHAT_CONSTANTS.APP_ID
    let region = COMETCHAT_CONSTANTS.REGION
    let authKey = COMETCHAT_CONSTANTS.AUTH_KEY
    let uid = params.get("uid");

    if (!appId || !region || !authKey || !uid) {
       appId = COMETCHAT_CONSTANTS.APP_ID || (localStorage.getItem('appId') ?? ""); // Use the latest appId if available
       region = COMETCHAT_CONSTANTS.REGION || (localStorage.getItem('region') ?? ""); // Default to 'us' if region is not found
       authKey = COMETCHAT_CONSTANTS.AUTH_KEY || (localStorage.getItem('authKey') ?? "");

    }

    const uiKitSettings = new UIKitSettingsBuilder()
      .setAppId(appId)
      .setRegion(region)
      .setAuthKey(authKey)
      .subscribePresenceForAllUsers()
      .build();

    if (uiKitSettings != null) {
      CometChatUIKit.init(uiKitSettings)?.then(() => {
      console.log("CometChat UI Kit initialized successfully.");

            if(!uid){
                return;
            }
          CometChatUIKit.login(uid)
            .then(() => {

                console.log("CometChat UI Kit initialized and user logged in successfully.");
              setIsReady(true);
            })
            .catch((err) => setError("Login failed: " + (err?.message || err)));
        })
        .catch((err) => setError("Init failed: " + (err?.message || err)));
    } else {
      setError("Failed to build UIKit settings.");
    }
  }, []);

  return (
    <div style={{ height: "100vh", width: "100vw", overflow: "hidden" }}>
      {error ? <p>{error}</p> : isReady ? <CometChatHome /> : <p>Loading chat...</p>}
    </div>
  );
};

export default CometChatWidget;
Update SampleApp/src/index.tsx as follows:
In src/index.tsx, update the render logic as follows:
import ReactDOM from 'react-dom/client';
import './index.css';
import App from './App';
import reportWebVitals from './reportWebVitals';

const getBrowserTheme = (): 'light' | 'dark' => {
  const isDarkTheme = window.matchMedia('(prefers-color-scheme: dark)').matches;
  return isDarkTheme ? 'dark' : 'light';
};


        const root = ReactDOM.createRoot(document.getElementById('root') as HTMLElement);
    root.render(
      <App theme={getBrowserTheme()} />
    );
// If you want to start measuring performance in your app, pass a function
// to log results (for example: reportWebVitals(console.log))
// or send to an analytics endpoint. Learn more: https://bit.ly/CRA-vitals
reportWebVitals();
Add widget route in App.tsx as follows:
Inside App.tsx, import and register the CometChatWidget route:
import "./styles/App.css";
import { BrowserRouter } from 'react-router-dom';
import Login from "./components/CometChatLogin/CometChatLogin";
import { AppContextProvider } from "./context/AppContext";
import { Navigate, Route, Routes } from "react-router-dom";
import Credentials from "./components/CometChatLogin/CometChatAppCredentials";
import { CometChatHome } from "./components/CometChatHome/CometChatHome";
import CometChatWidget from "./components/CometChatWidget/CometChatWidget";
interface IAppProps {
  loggedInUser?: CometChat.User,
  theme?: string
}

function App(props: IAppProps) {


  const App = () => {
    return (
      <AppContextProvider>
          <Routes>
            <Route path='/' element={<Navigate to='/home' replace />} />
            <Route path='login' element={<Login />} />
            <Route path='home' element={<CometChatHome theme={props.theme} />} />
            <Route path='credentials' element={<Credentials />} />
             <Route path='widget' element={<CometChatWidget />} /> {/* ✅ Widget Route */}
          </Routes>
      </AppContextProvider>
    );
  };

  return (
    <div>
      <div className='App' >
        <BrowserRouter>
          <App />
        </BrowserRouter>
      </div>
    </div>
  );
}

export default App;
Make sure it’s wrapped inside BrowserRouter and appropriate context providers.
Deploy and Access the Widget:
Once everything is set up locally, it’s time to deploy your widget on your server. After deployment, your CometChat widget will be accessible at the/widget route.
Create cometchat-widget.js for Widget UI
This step adds a light weight script (cometchat-widget.js) that you can embed into any website to launch your CometChat widget in a floating iframe.
File Location
Create a file named cometchat-widget.js in public directory:
public/cometchat-widget.js
Script
Paste the following code inside cometchat-widget.js:
(
    function () {
        console.log("✅ cometchat-widget.js loaded");


        // 1. Prefer settings from window.CometChatWidgetSettings
        const settings = window.CometChatWidgetSettings || {};

        // 2. Parse from URL if not available in settings
        const urlParams = new URLSearchParams(window.location.search);
        const uid = settings.uid || urlParams.get("uid") || "";


        if (!uid) {
            console.error("❌ CometChat Widget: Missing configuration!");
            return;
        }

        console.log("✅ Using Config -", { uid });

        // Create launcher button
        const launcher = document.createElement("div");
        launcher.id = "cometchat-launcher";
        launcher.innerText = "💬 Chat";
        launcher.style.position = "fixed";
        launcher.style.bottom = "20px";
        launcher.style.right = "20px";
        launcher.style.backgroundColor = "#005fff";
        launcher.style.color = "white";
        launcher.style.padding = "12px 16px";
        launcher.style.borderRadius = "999px";
        launcher.style.cursor = "pointer";
        launcher.style.fontFamily = "sans-serif";
        launcher.style.fontSize = "16px";
        launcher.style.zIndex = "999999";
        document.body.appendChild(launcher);

        // Create iframe for chat widget
        const iframe = document.createElement("iframe");
        iframe.id = "cometchat-iframe";
        iframe.style.position = "fixed";
        iframe.style.bottom = "80px";
        iframe.style.right = "20px";
        iframe.style.width = "400px";
        iframe.style.height = "600px";
        iframe.style.border = "none";
        iframe.style.borderRadius = "12px";
        iframe.style.boxShadow = "0 4px 20px rgba(0,0,0,0.2)";
        iframe.style.zIndex = "999998";
        iframe.style.display = "none";

        // Append URL params to iframe src
        const query = new URLSearchParams({ uid }).toString();
        iframe.allow = "microphone; camera; display-capture; autoplay; encrypted-media";
        iframe.src = `<Your deployed URL>/widget?${query}`;
        document.body.appendChild(iframe);

        // Toggle chat visibility
        launcher.onclick = () => {
            iframe.style.display = iframe.style.display === "none" ? "block" : "none";
        };
    })();
Deploy and Access the Widget
Simply deploy this app to your servers and now you will be able to access cometchat-widget.js with deployed URL.
You can integrate the widget into any external website by embedding the script we created earlier.
Embed in Any Website
<!DOCTYPE html>
<html>
<head>
<title>Test Chat Widget</title>
</head>
<body>
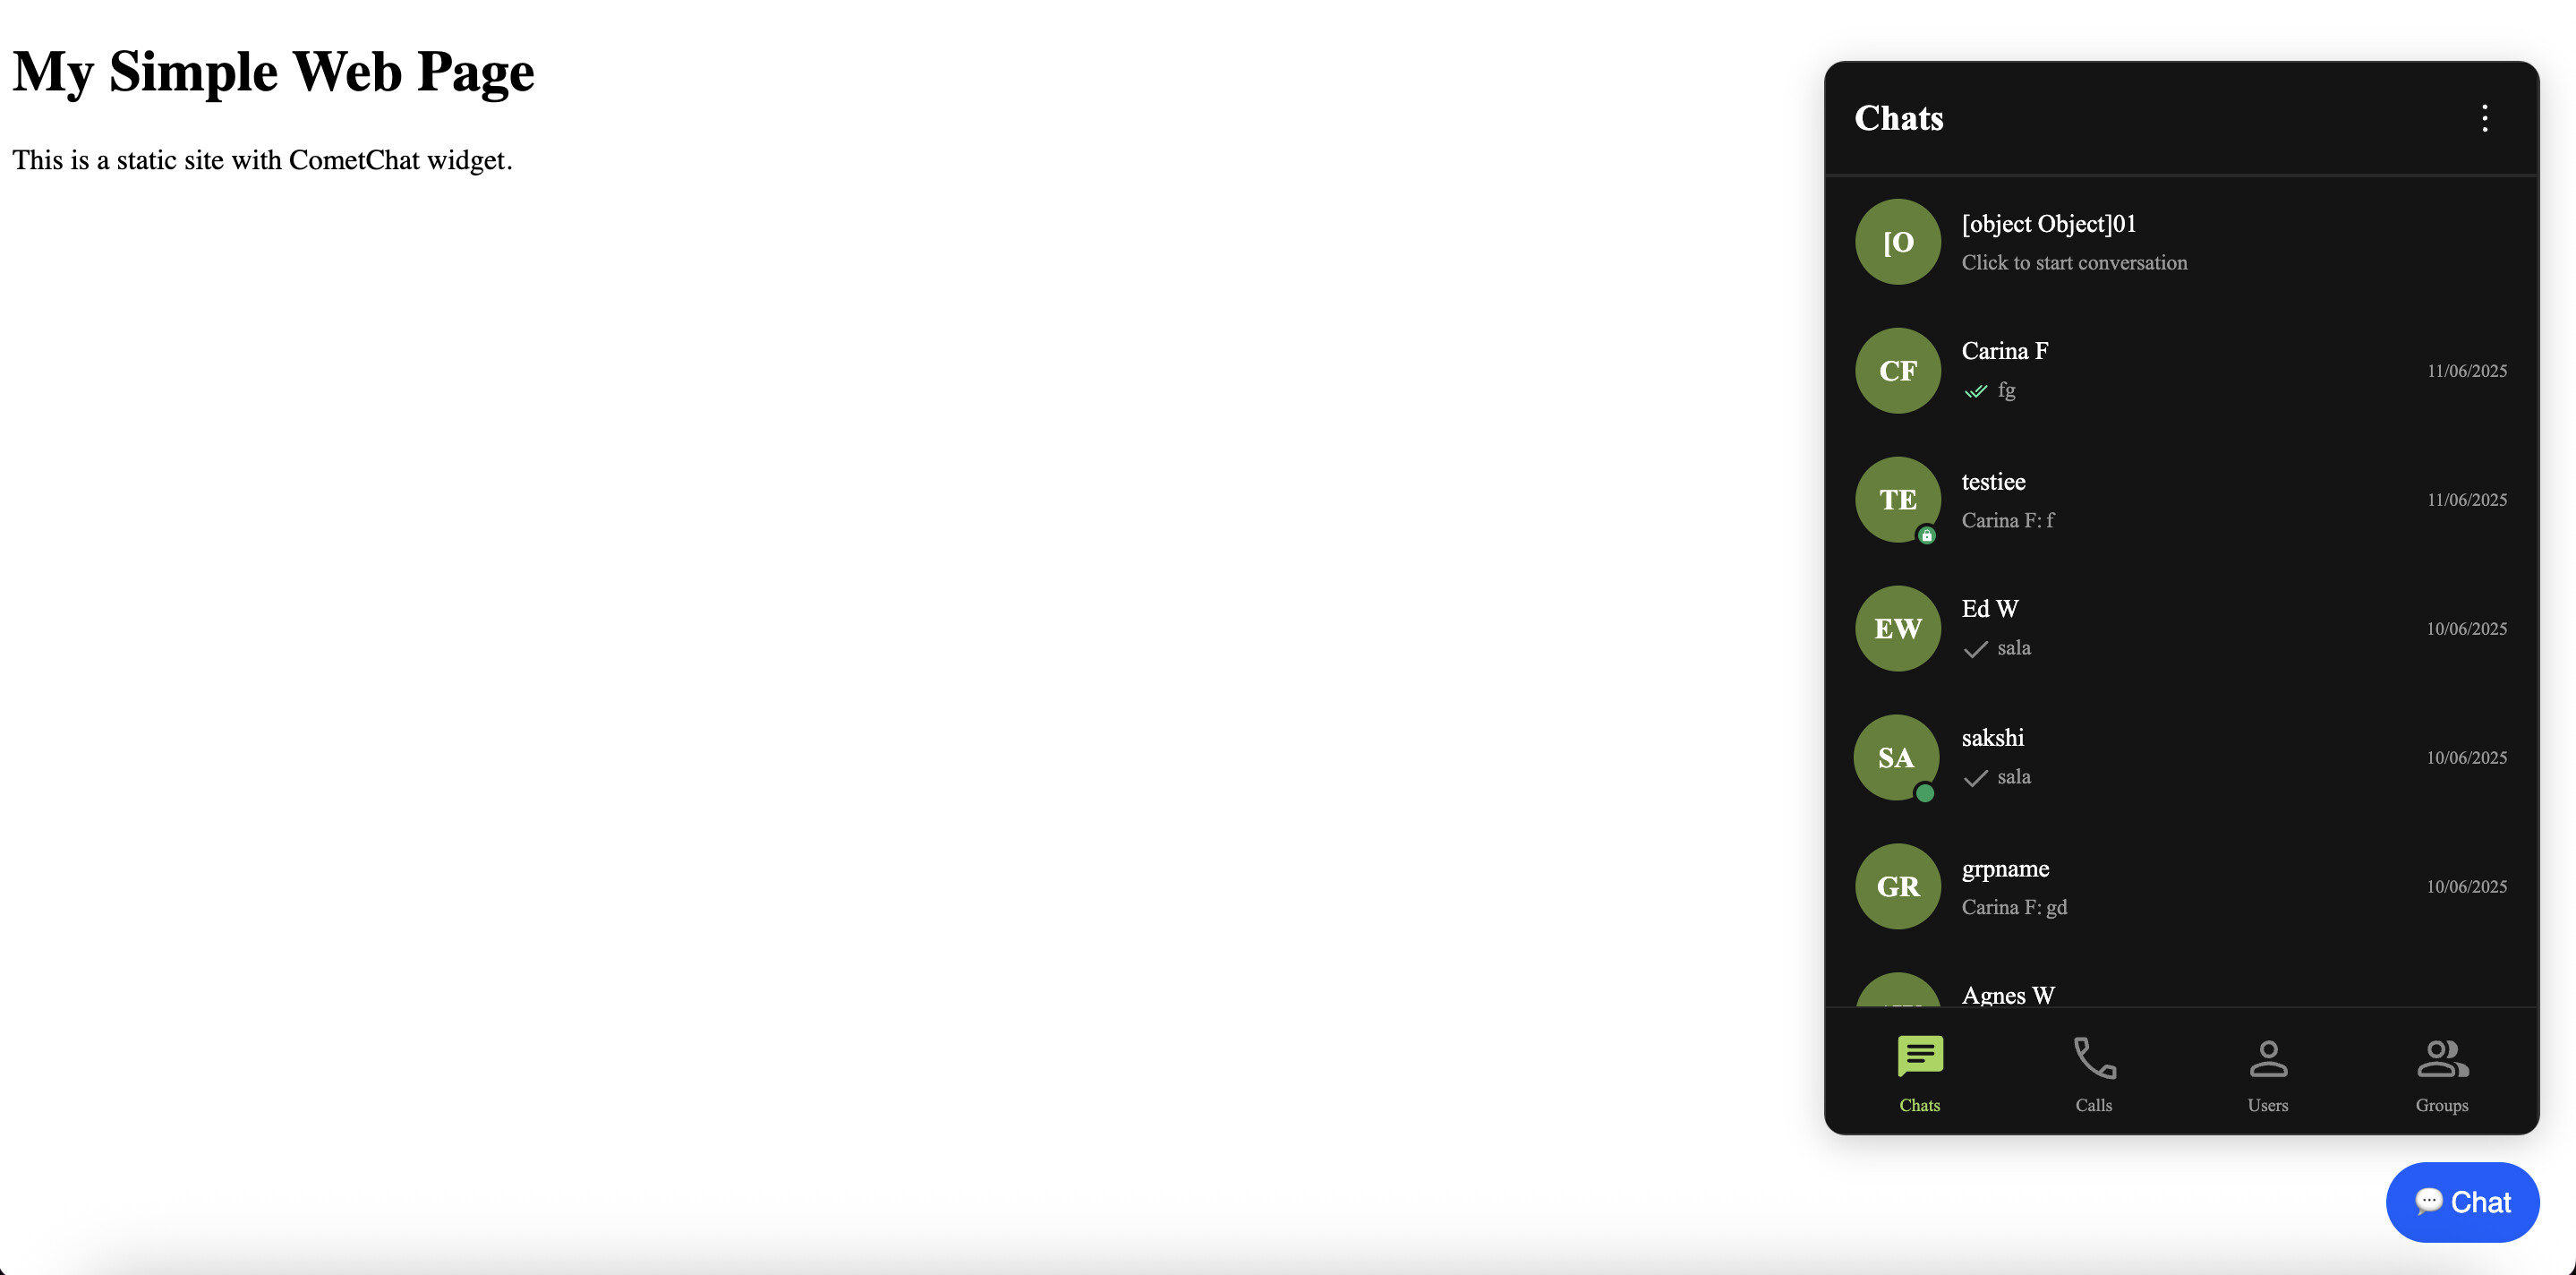
<h1>My Simple Web Page</h1>
<p>This is a static site with CometChat widget.</p>
<div id="root">
</div>
<!-- CometChat Widget Settings -->
<script>
window.CometChatWidgetSettings = {
uid:"<Enter Your UID Here>"
};
</script>
<!-- Widget Script -->
<script defer src="<Your Deployed URL>/cometchat-widget.js"></script>
</body>
</html>
Results :
VisualBuilder Web Widget:
Introduction
This guide empowers you to build and embed a custom CometChat web widget into a Visual Builder application. Leveraging the CometChat React v6 UI Kit, the widget delivers a fully functional, customizable chat experience that can be seamlessly integrated into any web page using a single <script> tag.
Prerequisites
Before you begin, you need to create a Visual Builder application and configure CometChat integration within it. You can follow the official CometChat documentation for setting that up:
Create Visual Builder App with CometChat
Create the CometChatWidget Component
Next, you’ll build the core widget component that will be embedded through the Visual Builder. This component will handle user authentication using the uid from the URL, initialize the CometChat interface, and manage loading and error states for a smooth user experience.
Create File
Inside your React project, create a Components folder and file CometChatWidget.tsx
Component Code
Paste the following code into CometChatWidget.tsx:
import { useEffect, useState } from "react";
import CometChatApp from "../CometChat/CometChatApp";
import { CometChatUIKit } from "@cometchat/chat-uikit-react";

const CometChatWidget = () => {
  const [isReady, setIsReady] = useState(false);
  const [error] = useState<string | null>(null);

  useEffect(() => {
    console.log("CometChatWidget mounted");

    const params = new URLSearchParams(window.location.search);
    const uid = params.get("uid");
    if (!uid) return;

    CometChatUIKit.getLoggedinUser().then((user: CometChat.User | null) => {
      if (!user) {
        // If no user is logged in, proceed with login
        CometChatUIKit.login(uid)
          .then((user: CometChat.User) => {
            console.log("Login Successful:", { user });
            setIsReady(true);
          })
          .catch(console.log);
      } else {
        // If user is already logged in, proceed
        setIsReady(true);
      }
    });
  }, []);

  return (
    <div style={{ height: "100vh", width: "100vw", overflow: "hidden" }}>
      {error ? <p>{error}</p> : isReady ? <CometChatApp /> : <p>Loading chat...</p>}
    </div>
  );
};

export default CometChatWidget;
- Make sure that
CometChatAppis correctly imported from your internal CometChat implementation.
Once the user is logged in or already authenticated, the CometChat interface will mount automatically.
Update App.tsx to Include Widget Route
With the CometChatWidget component in place, the next step is to expose it through a dedicated route. By configuring the /widget path in your React application, you ensure the widget can be accessed directly via your deployed domain.
Update src/App.tsx
Replace your existing App.tsx with the following code:
import { useEffect } from "react";
import { Route, Routes } from "react-router-dom";
import { AppContextProvider } from "./CometChat/context/AppContext";
import CometChatWidget from "./Components/CometChatWidget";

const App = () => {
  useEffect(() => {
    console.log("App mounted");
  }, []);

  return (
    <AppContextProvider>
      <Routes>
        {/* ✅ Widget Route */}
        <Route path="widget" element={<CometChatWidget />} />
      </Routes>
    </AppContextProvider>
  );
};

export default App;
- Make sure
CometChatWidgetis correctly imported fromsrc/Components/CometChatWidget.tsx.
Update main.tsx for Initialization & Routing
To ensure that the CometChat UIKit is initialized properly and routing is supported (for loading the widget via /widget), update your main.tsx with the following setup.
This includes:
- Initializing CometChat with your credentials.
Update src/main.tsx
import ReactDOM from "react-dom/client";
import App from "./App";
import {
  UIKitSettingsBuilder,
  CometChatUIKit,
} from "@cometchat/chat-uikit-react";
import { setupLocalization } from "./CometChat/utils/utils";
import { CometChatProvider } from "./CometChat/context/CometChatContext";
import { BrowserRouter } from "react-router-dom";

//Replace with your actual CometChat credentials
export const COMETCHAT_CONSTANTS = {
  APP_ID: "<Enter Your App ID here>",
  REGION: "<Enter Your Region here>",
  AUTH_KEY: "<Enter Your Auth Key here>",
};

//Configure UIKit settings
const uiKitSettings = new UIKitSettingsBuilder()
  .setAppId(COMETCHAT_CONSTANTS.APP_ID)
  .setRegion(COMETCHAT_CONSTANTS.REGION)
  .setAuthKey(COMETCHAT_CONSTANTS.AUTH_KEY)
  .subscribePresenceForAllUsers()
  .build();

//Initialize CometChat UIKit
CometChatUIKit.init(uiKitSettings)?.then(() => {
  console.log("CometChat UIKit initialized successfully");

  setupLocalization(); // optional

  const root = ReactDOM.createRoot(
    document.getElementById("root") as HTMLElement
  );

  root.render(
    <BrowserRouter>
      <CometChatProvider>
        <App />
      </CometChatProvider>
    </BrowserRouter>
  );
});
- Make sure to replace the placeholder values (
APP_ID,REGION, andAUTH_KEY) with your actual CometChat credentials from the CometChat dashboard. - The widget won’t render unless CometChat is properly initialized.
Deploy and Access the Widget
Once your local setup is complete, deploy the application to your preferred hosting provider. After deployment, the CometChat widget will be accessible via the /widget route on your hosted domain, ready to be integrated into any external website.
Create cometchat-widget.js for Widget UI
This step adds a light weight script cometchat-widget.js that you can embed into any website to launch your CometChat widget in a floating iframe — just like an actual chat widget .
File Location
Create a file named cometchat-widget.js in public directory:
public/cometchat-widget.js
Script
Paste the following code inside cometchat-widget.js:
(function () {
  console.log("cometchat-widget.js loaded");

  // 1. Prefer settings from window.CometChatWidgetSettings
  const settings = window.CometChatWidgetSettings || {};

  // 2. Parse from URL if not available in settings
  const urlParams = new URLSearchParams(window.location.search);


  const uid = settings.uid || urlParams.get("uid") || "";

  if ( !uid) {
    console.error(" CometChat Widget: Missing configuration!");
    return;
  }

  console.log(" Using Config -", { uid });

  // 🚀 Create launcher button
  const launcher = document.createElement("div");
  launcher.id = "cometchat-launcher";
  launcher.innerText = "💬 Chat";
  launcher.style.position = "fixed";
  launcher.style.bottom = "20px";
  launcher.style.right = "20px";
  launcher.style.backgroundColor = "#005fff";
  launcher.style.color = "white";
  launcher.style.padding = "12px 16px";
  launcher.style.borderRadius = "999px";
  launcher.style.cursor = "pointer";
  launcher.style.fontFamily = "sans-serif";
  launcher.style.fontSize = "16px";
  launcher.style.zIndex = "999999";
  document.body.appendChild(launcher);

  //  Create iframe for chat widget
  const iframe = document.createElement("iframe");
  iframe.id = "cometchat-iframe";
  iframe.style.position = "fixed";
  iframe.style.bottom = "80px";
  iframe.style.right = "20px";
  iframe.style.width = "400px";
  iframe.style.height = "600px";
  iframe.style.border = "none";
  iframe.style.borderRadius = "12px";
  iframe.style.boxShadow = "0 4px 20px rgba(0,0,0,0.2)";
  iframe.style.zIndex = "999998";
  iframe.style.display = "none";

  const query = new URLSearchParams({ uid }).toString();
  iframe.allow = "microphone; camera; display-capture; autoplay; encrypted-media";
  iframe.src = `<Your Deployed URL>/widget?${query}`;
  document.body.appendChild(iframe);

  //  Toggle widget on launcher click
  launcher.onclick = () => {
    iframe.style.display = iframe.style.display === "none" ? "block" : "none";
  };
})();
- This script creates a floating launcher button (
 Chat) in the bottom-right corner.
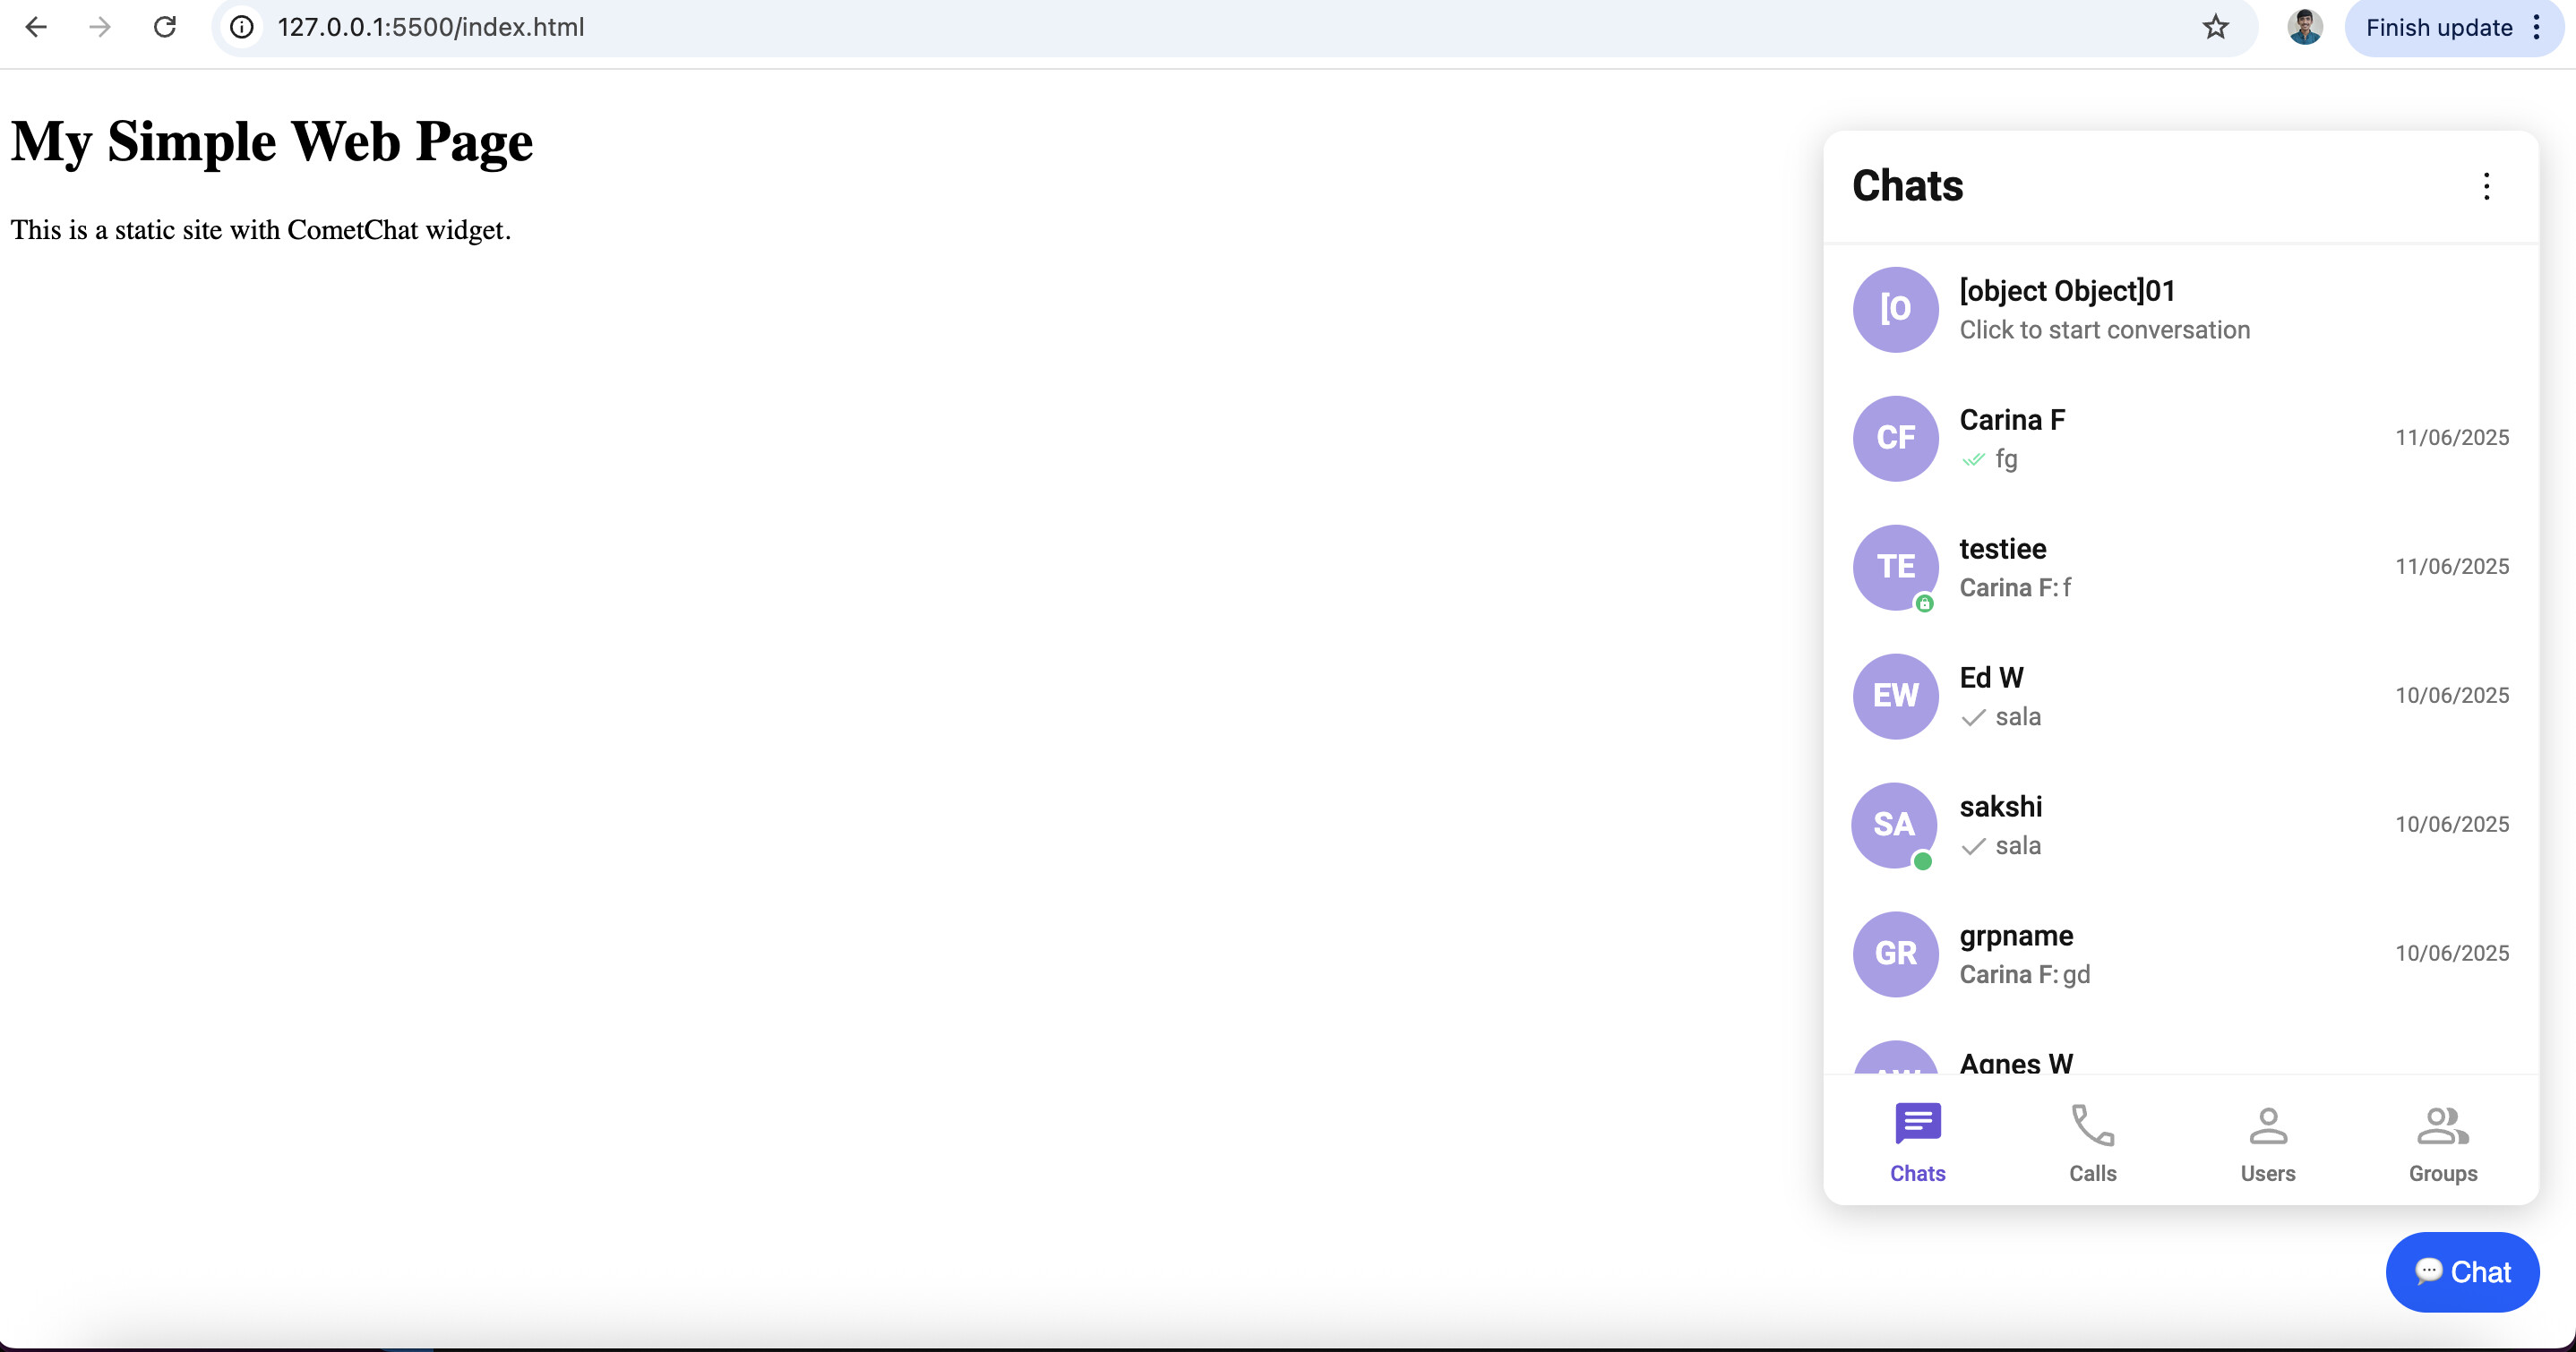
Deploy and Access the Widget
Once the app is deployed to your hosting server, the cometchat-widget.js script will be accessible via the deployed URL. You can now integrate the chat widget into any external website by embedding this script.
<!DOCTYPE html>
<html>
  <head>
    <title>Test Chat Widget</title>
  </head>
  <body>
    <h1>My Simple Web Page</h1>
    <p>This is a static site with CometChat widget.</p>
    <div id="root">

    </div>
    <!-- CometChat Widget Settings -->
     <script>
      window.CometChatWidgetSettings = {
        uid:"<Enter UID Here>"
      };
    </script>

    <!-- Widget Script -->
    <script defer src="<Your deployed URL>/cometchat-widget.js"></script>
  </body>
</html>