How to send an interactive message
Guide Details: node.js code
Intro
Interactive messages offer a dynamic way to engage users, enabling them to interact with your application directly within the messaging platform. Whether you’re responding to user queries, collecting feedback, or guiding them through a process, sending interactive messages via the API is a powerful feature. Let’s delve into how you can achieve this effectively.
Sending Messages on Behalf of a User
To send a message on behalf of a user, utilize the send message API endpoint, and include the onBehalf parameter with the user UID you wish to send the message for.
Sending Messages as a Bot
For sending messages as a bot, refer to our Bot Integration guide, which details the process comprehensively.
Interactive Message Body
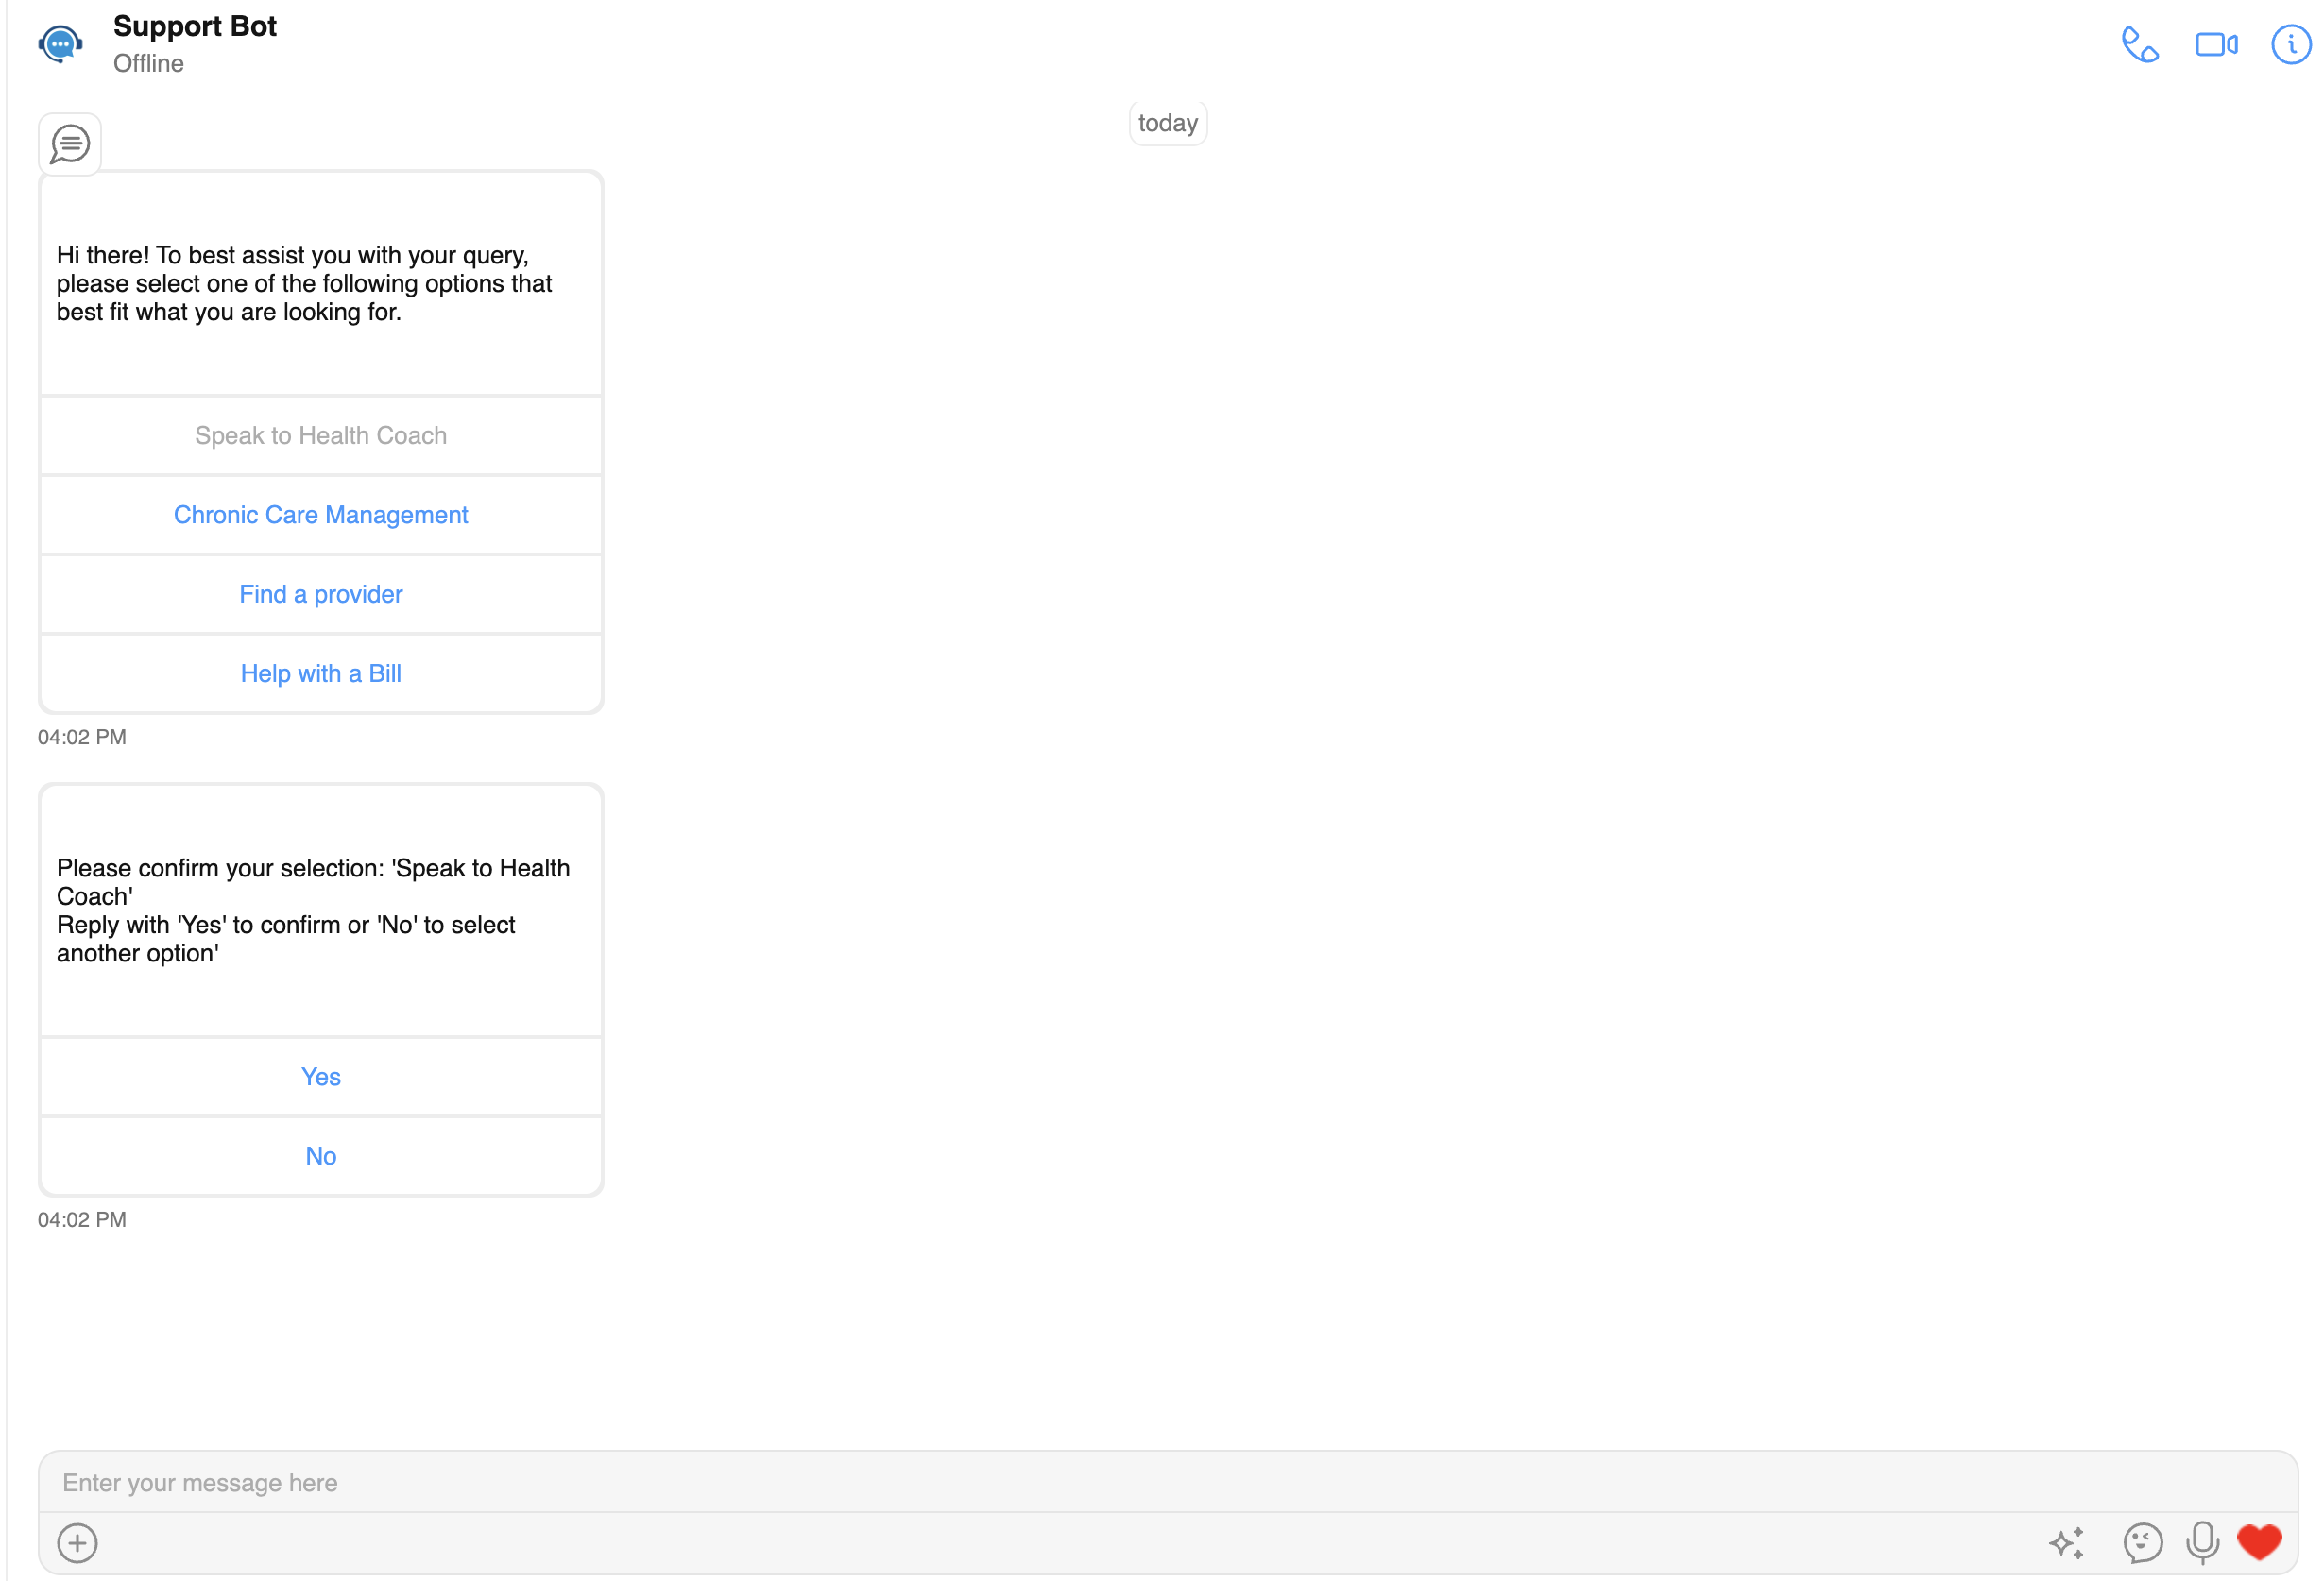
Consider a scenario where you need to follow up with a user based on their initial message, “I need help with my account.” To gather more details and route them appropriately, you’ll send an interactive message prompting the user to specify their needs further.
Below is the JSON structure for the interactive message. Please refer to the interacive message class documention you are using in your app. In our sample below, we will be sending a Card message.
Note that you need to add the API URL for the submit button to trigger. Make sure to set up this endpoint in your API correctly.
JSON interactive message
const card = {
  category: "interactive",
  type: "card",
  data: {
    interactionGoal: {
      type: "none",
    },
    allowSenderInteraction: true,
    interactiveData: {
      text: "Hi there! To best assist you with your query, please select one of the following options that best fit what you are looking for.",
      cardActions: [
        {
          elementType: "button",
          elementId: "element1",
          buttonText: "Speak to Health Coach",
          disableAfterInteracted: false,
          action: {
            actionType: "apiAction",
            url: "http://localhost:8000/sendConfirmation",
            method: "POST",
            payload: {
              data: {
                text: "Speak to Health Coach",
              },
            },
            headers: {
              "Content-Type": "application/json",
            },
            dataKey: "CometChatData",
          },
        },
        {
          elementType: "button",
          elementId: "element2",
          buttonText: "Chronic Care Management",
          disableAfterInteracted: false,
          action: {
            actionType: "apiAction",
            url: "http://localhost:8000/sendConfirmation",
            method: "POST",
            payload: {
              data: {
                text: "Chronic Care Management",
              },
            },
          },
        },
        {
          elementType: "button",
          elementId: "element3",
          buttonText: "Find a provider",
          disableAfterInteracted: false,
          action: {
            actionType: "urlNavigation",
            url: "https://www.cometchat.com/docs/home",
            payload: {
              data: {
                text: "Help with a Bill",
              },
            },
          },
        },
        {
          elementType: "button",
          elementId: "element4",
          buttonText: "Help with a Bill",
          disableAfterInteracted: false,
          action: {
            actionType: "apiAction",
            url: "http://localhost:8000/sendConfirmation",
            method: "POST",
            payload: {
              data: {
                text: "Help with Billing",
              },
            },
            headers: {
              "Content-Type": "application/json",
              onBehalfOf: "superhero1",
            },
            dataKey: "CometChatData",
          },
        },
      ],
    },
  },
  receiverType: "user",
  receiver: "patient1",
  tags: ["tag1"],
};
To send this card message, we will utilize axios to reach the Send Bot Message endpoint.
When constructing your API request body, ensure that you include the appropriate values for the Interactive Message. Refer to the CometChat Message Structure documentation for detailed information on the required parameters.
const axios = require("axios");
let data = JSON.stringify(card);

let config = {
  method: "post",
  maxBodyLength: Infinity,
  url: "https://{yourAppId}.api-{region}.cometchat.io/v3/bots/bot/messages",
  headers: {
    accept: "application/json",
    apikey: "{yourAPIKey}",
    "content-type": "application/json",
    uid: "bot",
  },
  data: data,
};

axios
  .request(config)
  .then((response) => {
    console.log(JSON.stringify(response.data));
  })
  .catch((error) => {
    console.log(error);
  });