Bot Integration with CometChat
If you are setting up your own bot, it is required to use ‘Send Bot Message’ endpoint to reply back to users on behalf of the bot.
This documentation provides a step-by-step guide on using the send bot message API endpoint.
Setting up your bot
Please read our Bot Overview before proceeding to ensure your Bot is set up correctly. Ensure you have a callback endpoint and configure your Bot in CometChat.
Sending a message to your Bots
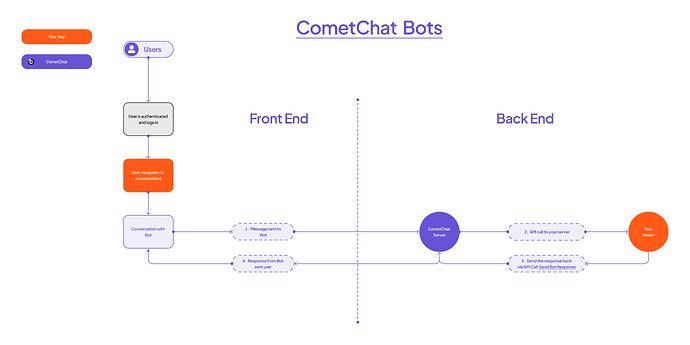
When a user sends a message to your Bot the following occurs:
- The server forwards the message to the Callback URL directed
- Your bot processes the incoming message, performs any necessary computations, and generates a response
One benefit of creating your own Bot is you can respond back with interactive messages. From your API, CometChat can send the response as an Interactive Message or types messages to collect data needed into your system.
Requirements
- Your Bot is created in CometChat
- API callback URL
- CometChat App
- Your front-end application or one of our CometChat Sample Apps found on our GitHub.
- Familiarity with Messages structure and Message types.
API Callback Endpoint
You will need to provide an API URL to your bot that you can call the send bot message API endpoint from.
In our example below, the endpoint in our API is “/BotCallback”.
Dependencies
- Axios
Create the CometChat users
You can create the CometChat users via the dashboard or API endpoint create users.
- Your Bot
- uid: bot
- End user
- uid: user1
Set up your API
We will be using a constanst.js file to keep track of our CometChat API contansts
and bot ids.
constants.js
Receive the message data in your API
The API url you provide to your CometChat Bot configuration will be the endpoint to receive all messages that end users send to your bot.
The body json sent to your API will look like this:
{
  "trigger": "after_message",
  "data": {
    "id": "1687",
    "muid": "_g9bf2m46t",
    "conversationId": "user1_user_support_bot",
    "sender": "user1",
    "receiverType": "user",
    "receiver": "support_bot",
    "category": "message",
    "type": "text",
    "data": {
      "text": "I need help with my account",
      "resource": "WEB-4_0_3-24ea543c-d5d5-4f28-a366-28692e8e2ee3-1712077854820",
      "entities": {
        "sender": {
          "entity": {
            "uid": "user1",
            "name": "Michelle Jones",
            "avatar": "https://data-us.cometchat.io/250165489a4e661f/avatars/77a1fb1e9d65.png",
            "status": "available",
            "role": "default",
            "lastActiveAt": 1712930751
          },
          "entityType": "user"
        },
        "receiver": {
          "entity": {
            "uid": "bot",
            "name": "Support Bot",
            "avatar": "https://data-us.cometchat.io/250165489a4e661f/avatars/3e3ff6bca040.jpg",
            "status": "offline",
            "role": "default",
            "lastActiveAt": 1709133672,
            "conversationId": "user1_user_bot"
          },
          "entityType": "user"
        }
      },
      "metadata": {
        ......
      }
    },
    "sentAt": 1712931683,
    "updatedAt": 1712931683
  }......
}
We can extract the value at data.data.text. This value is the text message sent to your Bot from the end user. The sender uid is at data.sender.
- data.data.text: “I need help with my account”
- data.sender: “user1”
Implement your logic
Upon recieving the payload from CometChat, you can extact any necessary data that you will need.
Here are couple things to consider in your logic:
-
Consider the problems you want the bot to solve.
-
Choose the appropriate technology stack based on your requirements, such as natural language processing (NLP) frameworks, machine learning libraries, etc.
-
Design the conversation flow of your bot, including the user interface and the interaction patterns.
After your bot logic has been set up in your API, you can now use your output to respond back to your end user.
Responding to the user
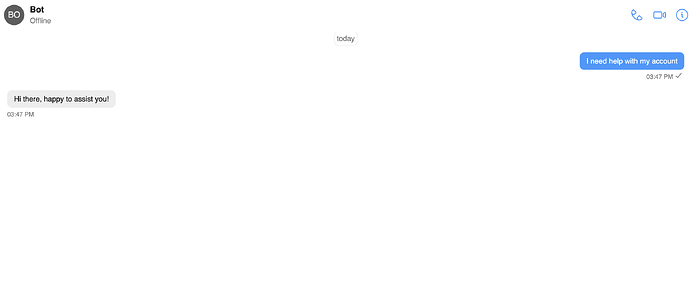
We have identified to send a follow up message to the end user. Based on their first message “I need help with my account”, we will send back to the user “Hi there, happy to assist you!”.
The Send Bot Message API Endpoint will require the following parameters:
-
receiverID: The ID of the recipient of the message. This could be a user ID, channel ID, or group ID depending on the context of your application.
-
messageData: The content of the message you want to send. This could be text, an image URL, a file attachment, or any other type of data supported by the Cometchat API.
-
botID: Bot ID
-
messageType: The type of message you’re sending, such as text, image, file, or custom type. This parameter helps the Cometchat API determine how to handle the message content.
We will also need to make sure our API headers, such as APP_ID and API_KEY are configured.
app.post("/BotCallback", async (req, res) => {
  // Your AI logic called here
  // get the path to your webhook data
  let receiverID = req.body.data.sender;
  // the message data of the message we want to send
  let messageData = { text: "Hi there, happy to assist you!" };
  let messageType = "text";

  let botID = constants.BOT_UID;

  // Call our local function
  await sendBotMessage(receiverID, messageData, messageType, botID);
});
Below our sendBotMessage() function calls the CometChat Send Bot Message API endpoint in order to send the text message.
async function sendBotMessage(receiverID, messageData, messageType, botID) {
  return new Promise(async (res, rej) => {
    const apiUrl =
      "https://" +
      constants.APP_ID +
      ".api-us.cometchat.io/v3.0/bots/" +
      botID +
      "/messages";
    const apiKey = constants.API_KEY;
    const requestBody = {
      data: messageData,
      receiverType: "user",
      receiver: receiverID,
      category: "message",
      type: messageType,
    };

    try {
      const response = await axios.post(apiUrl, requestBody, {
        headers: {
          Accept: "application/json",
          Apikey: apiKey,
          "Content-Type": "application/json",
        },
      });

      res(response);
    } catch (error) {
      console.error("Error sending message:", error);
      rej(error);
    }
  });
}
Result of responding as the Bot
Send an image
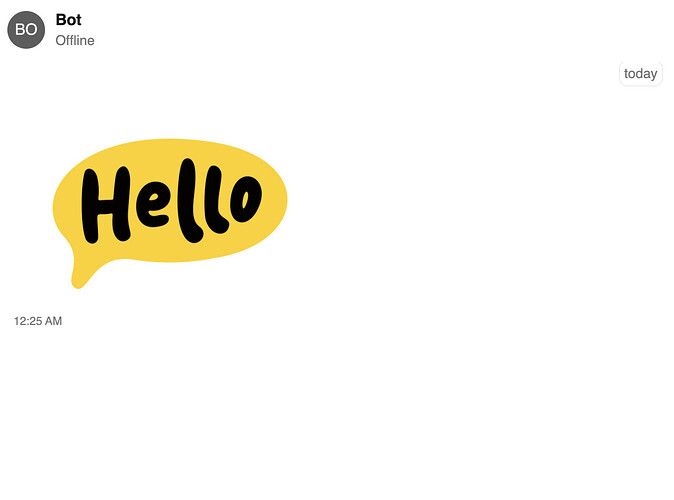
Based on our message structure, “image” and “text” messages are in the same category as “message”. This means we can use the same sendBotMessage function to send an image and only change the messageType. Looking at our API documentation, the messageData for an image will need to include an attachments array.
// get the path to your webhook data
let receiverID = req.body.data.sender;
let messageType = "image";
let botID = constants.BOT_UID;

// the message data of the message we want to send
let messageData = {
  attachments: [
    {
      url: "https://t4.ftcdn.net/jpg/05/13/79/77/360_F_513797754_KyKftzXhlul8FalDksafJf1TmtqrX1Px.jpg",
      name: "name",
      mimeType: "image",
      extension: "jpg",
    },
  ],
};

// Call our local function
await sendBotMessage(receiverID, messageData, messageType, botID);


